Create OTP/Mobile verification API with python FastAPI and Send.lk SMS Gateway
I was recently trying to implement Mobile number verification on one of my projects. But after a ton of research, I couldn't find any resource or useable service that gives the facilities to do it locally. That makes me think...
 Yes, you can and here is how we are going to do it.
So then I decide to do it by myself creating a separate API for the Mobile verification.
Creating the project
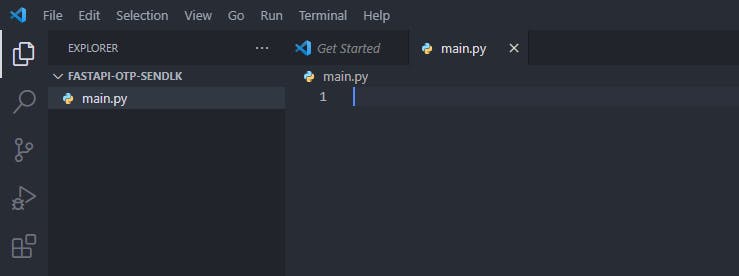
First of all, let's create a FastAPI project. I use vs-code for the development. create a folder for the project and inside it create the main python file main.py.

then let's create a virtual environment for the project. I will use venv, you should have to have python installed in your system I use python 3.10 the latest version currently available.
Open a new terminal inside project-root and run this command.
python -m venv venv
It will create a folder venv in the project root. after that, we can activate the virtual environment using the below command accordingly to your system.
# bash (Unix or MacOS)
source venv/bin/activate

# PowerShell (Windows)
venv\Scripts\Activate.ps1
If you use vs-code with python extension installed, as soon as you create the environment you will be asked to activate it automatically. Just press the YES and then kill and recreate the terminal.

To continue we need an SMS gateway, after trying several locally provided services I decided to go with send.lk they give you free 30 credits on sign up. (Not sponsored) I'm not going to explain it you can register from their website and get an API key.
Moving on, let's install the necessary packages to start coding.

pip install fastapi python-dotenv sendlk uvicorn
to keep a track of necessary packages let's create a requirements.txt file too.
pip freeze > requirements.txt
Start the project coding
Inside the main.py file let's import the FastAPI and create the app.
from fastapi import FastAPI

# Create the app
app: FastAPI = FastAPI(
    title="FastAPI Mobile Verification",
    version="0.1.0",
)

# App Root
@app.get("/", name="root")
def root():
    return {"message": f"Welcome to Mobile Verification API {app.version}"}
Done, Now we can start the debug server for the real-time preview of the API. Run the below command inside the venv activated terminal in the project root.
uvicorn --port 8000 --reload main:app
you will see that debug server started in port 8000, we use --reload flag to reload the server on file changes.

once again if you are using vs-code you can create the debug configuration by creating a launch.json file inside the project-root/.vscode folder with the following content.
{
    "version": "0.2.0",
    "configurations": [
        {
            "name": "Python: FastAPI",
            "type": "python",
            "request": "launch",
            "module": "uvicorn",
            "args": [
                "--port",
                "8000",
                "--reload",
                "main:app"
            ],
            "jinja": true
        }
    ]
}
After stating the debug server if you go to localhost:8000 you will see that the API is working and we are getting the content of the root path.


hope you are not getting any errors or problems running the API 🤞
Add Environment variables
Ok, let's add the Sendlk token and sender id to the .env file so that we can keep it private if we ever push this to a public repository. also, we will add a secret string to encrypt the OTP token.
# Send lk token
SENDLK_TOKEN="sendlk-token"
SENDER_ID="sender-id"
SECRET="my-super-secret"
and add these two lines to the top of the main.py
from dotenv import load_dotenv
# Load the .env file
load_dotenv(".env")
also, add the .gitignore file to the project root with the following content
### dotenv ###
.env
venv
.idea

### Python ###
# Byte-compiled / optimized / DLL files
__pycache__/
*.py[cod]
*$py.class
restart the server
I know the article is getting long but I'm going to finish this with one article. stay with me,

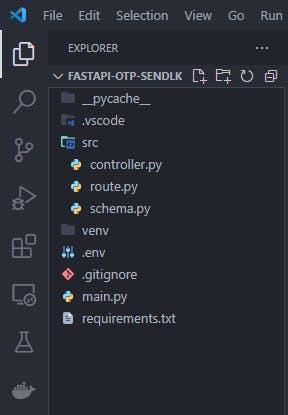
to implement the feature first we will create folder src, inside that create three files controller.py, schema.py and route.py. like this

before using the sendlk package we need to initialize it first after doing it main.py file will look like this
from fastapi import FastAPI
from dotenv import load_dotenv
import sendlk
import os

# Load the .env file
load_dotenv(".env")

SENDLK_TOKEN = os.environ.get("SENDLK_TOKEN")
SECRET = os.environ.get("SECRET")

sendlk.initialize(SENDLK_TOKEN, SECRET)

# Create the app
app: FastAPI = FastAPI(
    title="FastAPI Mobile Verification",
    version="0.1.0",
)

# App Root
@app.get("/", name="root")
def root():
    return {"message": f"Welcome to Mobile Verification API {app.version}"}
restart the server
Creating Controllers
inside the controller file, we are going to create some functions. first import those modules.
from sendlk.engine import SMS
from sendlk.responses import SmsResponse
from sendlk.exceptions import SendLKException
from sendlk.options import SendLKVerifyOption, SendLKCodeTemplet
from fastapi.exceptions import HTTPException
from starlette.responses import JSONResponse
import os
Ok, let's create send_verify_code function, it will accept the user phone number as an argument and will return the token.
def send_verify_code(phone_number: str) -> str:
    pass
Almost forgot, add this line before the function and after the import lines
SENDER_ID = os.environ.get("SENDER_ID")
then we will create SendLKVerifyOption object to call the actual function
def send_verify_code(phone_number: str) -> str:

    # Create the SMS option object
    options: SendLKVerifyOption = SendLKVerifyOption(
        code_length=4,
        expires_in=3,
        sender_id=SENDER_ID,
        code_templet=CustomCodeTemplet()
    )
code_lengthis the OTP code length
expires_inmeans how much time that users have to submit the code, the token will be expired after this time. here I use 3 minutes.
sender_idis the sender id that wants to use with the text message.
but... wait...

what the fudge nugget is the CustomCodeTemplet()
here is the deal, in the sendlk package it has a default text body to send code to the phone number which is something like 0000 is your verification code. ugly right?
so we can override that and provide our own text body. like adding our company name to it like this -> *0000 is the verification code for foo service.* Nice.
So let's do it. if you want you can create a separate file but I'm going to use the same file here. before the send function add this class.
class CustomCodeTemplet(SendLKCodeTemplet):
    def __init__(self):
        super().__init__()

    def text(self, code: str) -> str:
        return f"{code} is the varification code for foo serveice."
I don't think I have to explain the above code it's quite self explainable, right? Ok moving on, we are going to use try except for the sendlk call. add this to the function.
def send_verify_code(phone_number: str) -> str:

    try:
        # Create the SMS option object
        options: SendLKVerifyOption = SendLKVerifyOption(
            code_length=4,
            expires_in=3,
            sender_id=SENDER_ID,
            code_templet=CustomCodeTemplet()
        )

        response = SMS.send_verify_code(number=phone_number, verify_option=options)
        token = response.data.get("token", None)
        return token
    except SendLKException as e:
        raise HTTPException(status_code=400, detail=e.message)
response = SMS.send_verify_code(number=phone_number, verify_option=options)this is the line we acthuly send the code it will return theSmsResponseobject with the token inside it.
ok, what the fudge is this token? let me explain it to you.
Assume we providing phone number verification on our own mobile application. after we get the phone number from the user we make a request to the API with the number. then API will generate a code and send it to the user's phone number and API will send a response back to our app with the token which indicates the code. we don't even know what code the client received (obviously you can view it from the gateway dashboard). with the token app will wait for the client code submit. after that app will make another request to the API with code and token. API will verify the code and finish the process. Here is how it's work...

back to the code.
if everything goes right we return the token otherwise will raise an exception with status code 400.
let's move on to the next function which is validate_code.
def validate_code(token: str, code: str) -> str:
    try:
        # Validate the code
        response = SMS.validate_verify_code(code=code, token=token)
        return response.message
    except SendLKException as e:
        raise HTTPException(status_code=400, detail=e.message)
I'm sure the code is pretty self explainable right. anyway here we take token and code as arguments we will give it to the validate function on SMS class if we received success response we just return the message otherwise again we raise an exception.
ok, end of the file here is the full code
from sendlk.engine import SMS
from sendlk.responses import SmsResponse
from sendlk.exceptions import SendLKException
from sendlk.options import SendLKVerifyOption, SendLKCodeTemplet
from fastapi.exceptions import HTTPException
from starlette.responses import JSONResponse
import os

SENDER_ID = os.environ.get("SENDER_ID")

class CustomCodeTemplet(SendLKCodeTemplet):
    def __init__(self):
        super().__init__()

    def text(self, code: str) -> str:
        return f"{code} is the varification code for foo serveice."

def send_verify_code(phone_number: str) -> str:

    try:
        # Create the SMS option object
        options: SendLKVerifyOption = SendLKVerifyOption(
            code_length=4,
            expires_in=3,
            sender_id=SENDER_ID,
            code_templet=CustomCodeTemplet()
        )

        response = SMS.send_verify_code(number=phone_number, verify_option=options)
        token = response.data.get("token", None)
        return token
    except SendLKException as e:
        raise HTTPException(status_code=400, detail=e.message)

def validate_code(token: str, code: str) -> str:
    try:
        # Validate the code
        response = SMS.validate_verify_code(code=code, token=token)
        return response.message
    except SendLKException as e:
        raise HTTPException(status_code=400, detail=e.message)
Creating Schemas
moving on to the schema.py let's create some schemas.
from pydantic import BaseModel

class Token(BaseModel):
    token: str

class PhoneNumber(BaseModel):
    phone_number: str

class ValidateCode(Token):
    code: str

class Message(BaseModel):
    message: str
Alright, I know this is not necessary to do. but come on let's do it right.

if you don't know what is schemas it is like blueprints for the API, we predefined the request and response models so there will be no mistakes when calling the API.
Creating Routes
okay, finally we are going to create the routes
from fastapi import APIRouter
from src.controller import send_verify_code, validate_code
from src.schema import PhoneNumber, ValidateCode, Token, Message

router = APIRouter(prefix="/code")

@router.post("/send", response_model=Token)
def send_verify_code_handler(phone_number: PhoneNumber):
    token = send_verify_code(phone_number.phone_number)
    return Token(token=token)

@router.post("/validate", response_model=Message)
def validate_code_handler(validate: ValidateCode):
    message = validate_code(validate.token, validate.code)
    return Message(message=message)
you can clearly see what is going on, again I'm not going to explain line by line this is not entirely a FastAPI tutorial after all. anyway, we create sub route /code and add two post requests to it. send_verify_code_handler and validate_code_handler which will accept requests according to the schemas and return the response appropriately.
Finishing the Project
as the final step back to the main.py,
import the router after the sendlk initialize line then add the route to the main app, that's it we done.
from fastapi import FastAPI
from dotenv import load_dotenv
import sendlk
import os

# Load the .env file
load_dotenv(".env")

SENDLK_TOKEN = os.environ.get("SENDLK_TOKEN")
SECRET = os.environ.get("SECRET")

sendlk.initialize(SENDLK_TOKEN, SECRET)

# Imports routes
from src.route import router

# Create the app
app: FastAPI = FastAPI(
    title="FastAPI Mobile Verification",
    version="0.1.0",
)

# App Root
@app.get("/", name="root")
def root():
    return {"message": f"Welcome to Mobile Verification API {app.version}"}

app.include_router(router, prefix="/api")
Okay, It's QA time. Run the server, reload if it's already running.
and go to this URL

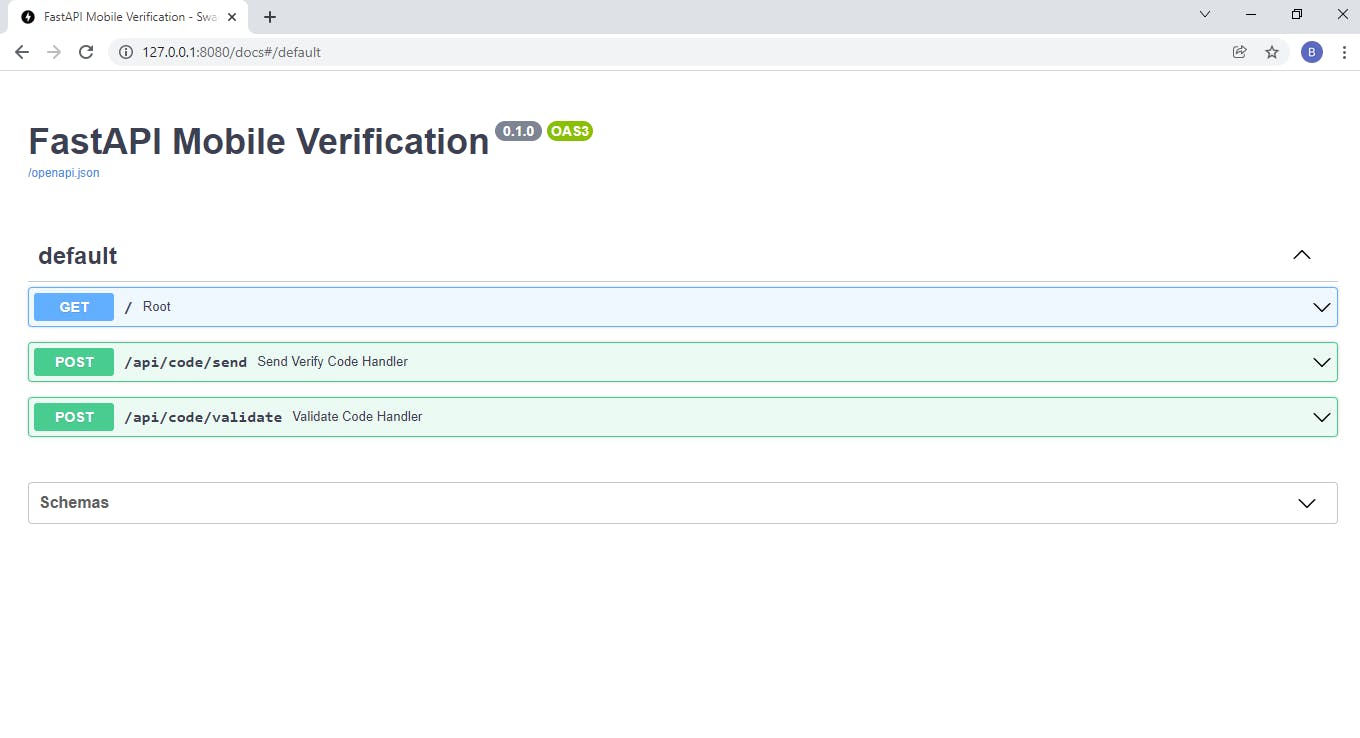
you got your own auto-generated Swagger UI that's the beauty of FastAPI and that's why we create all the schemas too. Cool right?

try it, play it, do whatever you want with it. and here is the repo if you want to take a look at the code.
Peace out!


